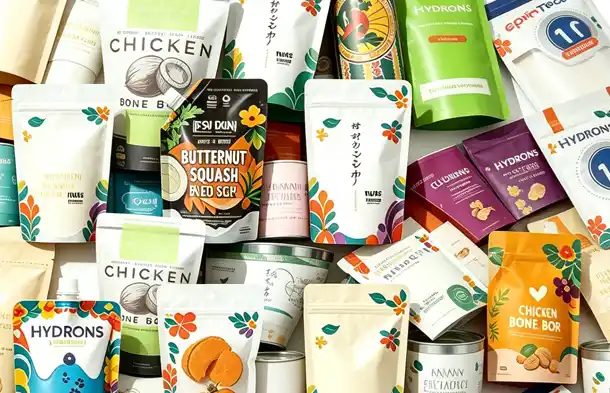
Stop Spills & Speed Up Lines: Matching Pre-Opened Bag Size & Gusset to Your Powder
Protein powder dust exploding into the air. Coffee grounds spilling over the filling nozzle. A bag that won’t stand up on the shelf.
These are not random accidents. They are the direct results of choosing the wrong bag dimensions or gusset design for your specific powder.
Unlike rigid containers, a flexible stand-up bag relies on precise sizing to work with your filling equipment and your product’s physical behavior. A bag that is too narrow creates blowback. A gusset that is too shallow won’t stand. A film that isn’t anti-static leaves product residue on the seal area.
This guide walks you through four critical decisions—width, length, gusset style, and bottom shape—to help you select reliable pre-opened bags for powder applications.
Step 1: Calculate the Right Bag Width (Not What You Think)
Most people measure the product first. That is a mistake.
Start with your filling nozzle. For powders, the bag’s open mouth must clear the nozzle with 5–10mm of air gap on each side. If the bag fits too tightly around the nozzle, friction will cause misfeeds. If it’s too loose, powder dust will escape during the fill.
General width guidelines for pre-opened bags used in powder lines:
| Bag Width (mm) | Best For (Powder Type) | Typical Fill Nozzle OD |
|---|---|---|
| 100 – 120 | Small samples, single-serve protein | 20 – 25mm |
| 140 – 180 | Retail spices, collagen, superfoods | 25 – 35mm |
| 200 – 240 | Bulk protein, flour, coffee (1-2 lbs) | 35 – 45mm |
| 260 – 320 | Industrial / pet food (5+ lbs) | 45 – 55mm+ |
Action step: Measure your current or planned filling nozzle. Add 10mm to each side. That is your minimum bag width. Explore pre-opened bag widths available for powder filling lines.
Step 2: Match Bag Length to Fill Depth and Seal Area
Length is where many buyers make a costly mistake: they order bags that are too tall, trying to “save room” for later.
A bag that is too long creates two problems:
-
Excess film above the fill line flops over, interfering with the sealing jaw.
-
The product drops too far from the nozzle, creating a dust plume.
A reliable rule for powder applications: The filled product should reach no lower than 1/3 of the way down from the top seal. The remaining 2/3 provides the “headspace” for the gusset to expand and the bag to stand.
Example: For a final bag height of 250mm, the fill depth should be approximately 160–170mm from the bottom. Request a size recommendation for your specific powder density.
Step 3: Choose Your Gusset Style – The Make-or-Break Decision
The gusset (the folded material on the sides or bottom) determines whether your bag stands upright or slumps over like a deflated balloon.
| Gusset Style | Appearance on Shelf | Powder Suitability | Key Consideration |
|---|---|---|---|
| Round Bottom (K-style) | Wide, stable base | Best for dense, free-flowing powders (protein, flour) | Requires specialized filling equipment to open fully |
| Flat Bottom (Block Bottom) | Box-like, premium | Excellent for very fine powders (spices, matcha) | More material = higher cost, but best stability |
| Side Gusset (Standard Doypack) | Narrow, tapered base | Works for most powders; less stable than flat bottom | Most common and cost-effective |
For most protein, collagen, and superfood brands: A standard side-gusseted stand-up pouch with a 35–50mm bottom gusset is the proven workhorse. It offers the best balance of stability, material cost, and filling speed.
For premium spices or matcha: A flat bottom pre-opened bag provides a rigid, box-like shelf presence that signals quality. However, it runs slower on most automatic fillers.
The Anti-Static Factor (Critical for Fine Powders)
Here is a hidden variable: triboelectric charging. When fine powder (especially protein or spice) rubs against the inner film during filling, it generates static electricity. The charged powder then clings to the seal area, preventing a proper heat seal and causing leaks.
Solutions in descending order of effectiveness:
-
Specify anti-static film (additive in the polyethylene layer) – most reliable.
-
Use ionizing air bars on your filler – effective but requires equipment investment.
-
Slow down fill speed – reduces charge generation but cuts throughput.
If you package fine, dry powders (<50 microns), always request anti-static properties.
Step 4: Match the Bottom Gusset Width to Your Product Weight
The wider the bottom gusset, the more stable the bag—but also the more film material used.
| Product Weight | Recommended Bottom Gusset Width | Typical Bag Width |
|---|---|---|
| 100 – 250g | 30 – 35mm | 120 – 140mm |
| 250 – 500g | 35 – 45mm | 140 – 180mm |
| 500g – 1kg | 45 – 60mm | 180 – 220mm |
| 1kg – 2kg | 60 – 80mm | 220 – 260mm |
Golden rule for powder gussets: The gusset width should be approximately 25–30% of the bag width. A 200mm wide bag should have a 50–60mm gusset. Any less, and the bag will be tippy. Any more, and you are wasting film.

Common Powder Packaging Failures (And Their Fixes)
| Problem | Root Cause | Fix |
|---|---|---|
| Powder in the seal area | Static charge or fill height too high | Add anti-static film; reduce fill depth by 15% |
| Bags won’t stand straight | Gusset too narrow for bag width | Increase bottom gusset to 30% of bag width |
| Dust escaping during fill | The bag mouth too tight on nozzle | Increase bag width by 10–15mm |
| Bags jamming on filler | Inconsistent pre-opening or limp film | Specify stiffer film construction (increase gauge) |
| Leaking after weeks in warehouse | Poor seal due to powder contamination | Install dust extraction at fill point |
Your Pre-Flight Checklist Before Ordering
Before you commit to 50,000 units of any pre-opened bag for your powder line, complete this checklist:
-
Nozzle measurement confirmed – Bag mouth must clear nozzle with a 5–10mm gap.
-
Fill depth calculated – Product reaches no lower than 1/3 from top.
-
Gusset style chosen – Side (standard), flat bottom (premium), or round (bulk).
-
Gusset width ratio – Approximately 25–30% of bag width.
-
Anti-static specified – Required for fine powders under 50 microns.
-
Sample run completed – Test 50-100 bags on your actual line.
Most suppliers skip step 6. That is where failures happen.
Request a sample pack of pre-opened bags for powder testing – Run them on your filler. Check the seal area for dust. Fill them, seal them, and let them sit for 48 hours. Then squeeze. Only when they pass your real-world test should you scale.
The Bottom Line
Choosing the right pre-opened bag for powders is not guesswork. It is a calculation:
(Nozzle size + 10mm) x (Fill depth + 1/3 headspace) x (Gusset width = 30% of bag width) = Your starting specification.
Adjust from there based on your powder’s density, flowability, and static behavior.
If you are currently guessing at sizes or struggling with dust on your seal bars, contact Wizpackaging for a free powder packaging audit. We’ll help you document your nozzle size, fill speed, and powder characteristics – then recommend the exact bag dimensions and film construction to eliminate waste and maximize line uptime.